このコードラボでは、既存のAndroidアプリをmulti-module project化する方法を学びます。
このようにapp moduleだけで構成されているprojectを、
下記の図の通り、multi-module project化します。
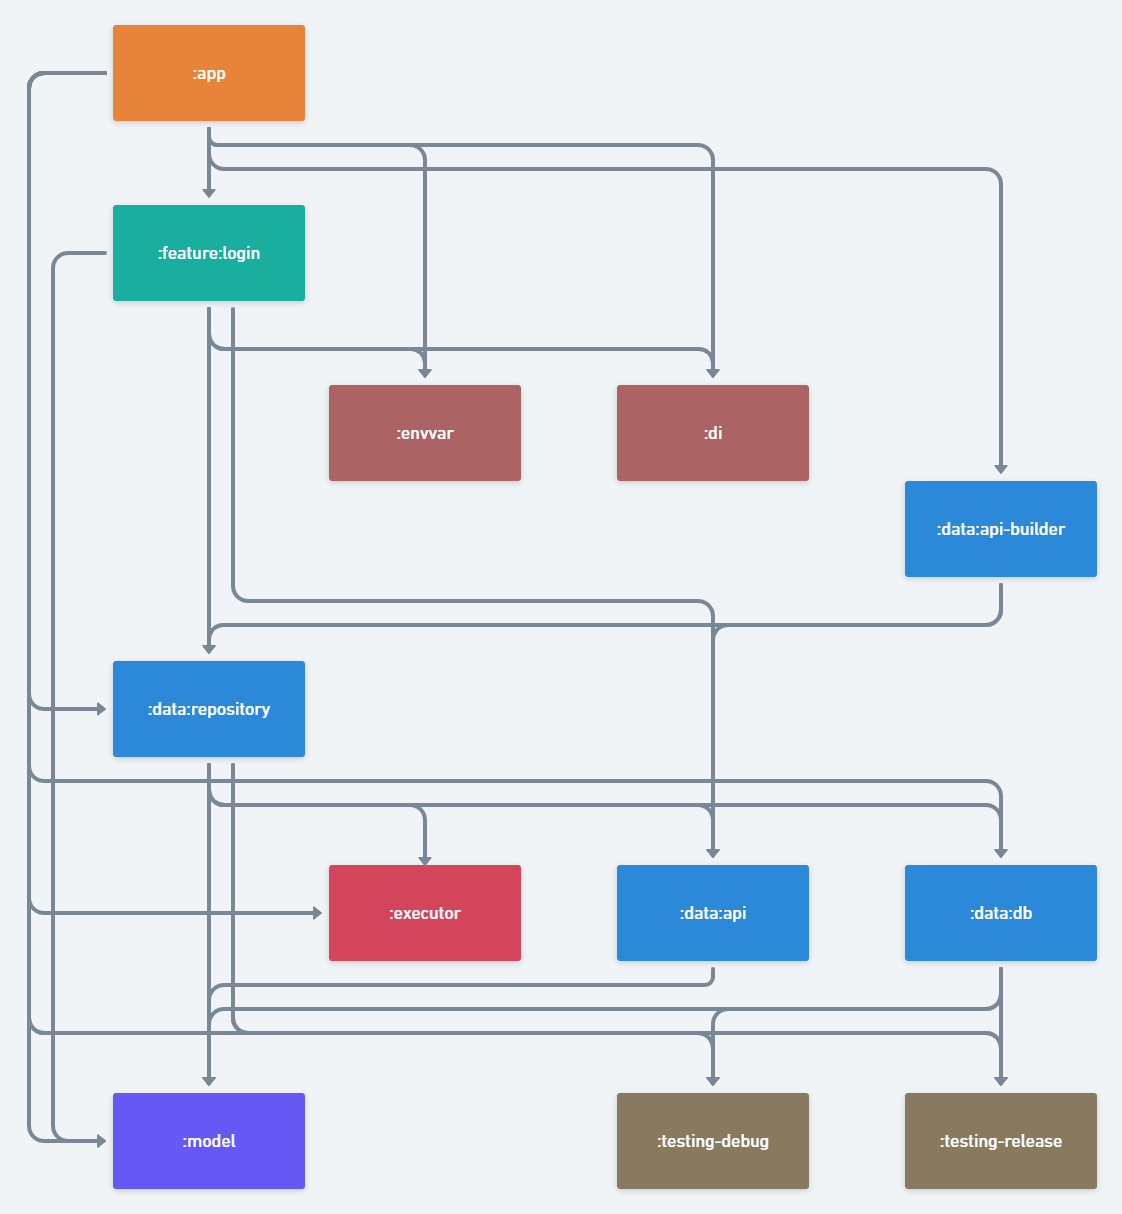
multi-module projectの利点
- ビルド時間の短縮が期待できます
- 適切なレイヤーでmoduleを分ける事で、クラス間の依存関係をクリーンに保てます
- 複数バージョン(無料版・有料版など)のアプリをビルドする場合、Build Variantを使わずにそれぞれのバージョンのapp moduleを用意して実現ができます
- Build Variantによる複雑化を防げます
- Android Studioのリファクタリング機能は選択中のBuild Variantしか配慮されませんが、 それぞれのバージョンのapp moduleを用意すれば、この挙動に悩まされることがありません
- 各moduleでの関心事を小さく保てます
- 例えばWebAPIのレスポンスクラスはrepository moduleまでは意識するが、 repositoryを使うmoduleからはアクセスできない、という制限が可能です
このコードラボで学べること
- 新しいlibrary moduleの追加方法
- 既存moduleから別moduleへスムーズにクラスを移動する方法
- release/debugで依存するlibrary moduleを切り替える方法
- app moduleのBuildConfigをlibrary moduleから間接的に参照する方法
必要となる前提知識
- Kotlinの基礎的な構文についての知識
- build.gradleへの ビルド依存関係の追加 方法、apiとimplementationの違い
- Daggerの基礎的な知識
- Daggerの基礎的な知識については、 Using Dagger in your Android app を参照して下さい
このコードラボで必要なもの
- Android Studio 3.5.3(他のバージョンでも問題なくコードラボは進められる場合はありますが、いくつかの要素がなかったり違う見た目になっている場合があります)
コードのダウンロード
以下のリンクからこのコードラボで必要なコードすべてをダウンロードすることができます。
または、以下のコマンドでコマンドラインからGitHubリポジトリをcloneすることもできます。
$ git clone https://github.com/DroidKaigi/architecture-components-samples.git
今回のコードラボで使用するブランチは下記です。
- droidkaigi-2020-codelab - デフォルトブランチ、このブランチから module 分割をおこないます
- droidkaigi-2020-codelab-modularized - module分割済みのブランチです
まずはそのままの状態でサンプルアプリがどういう構造になっているかをみてみましょう。次の手順に従ってAndroid Studioでサンプルアプリを開きます。
architecture-components-samples-droidkaigi-2020-codelab.zipファイルをダウンロードしている場合は、ファイルを展開します- Android Studioで
GithubBrowserSampleプロジェクトを開きます  [実行]ボタンをクリックし、エミュレータを選択するか、Androidデバイスを接続すると、下記の画面が表示されるはずです

GitHubのログイン画面が表示された場合、ログインをお願いします。
(ログインしないと、GitHub APIのRate Limitにすぐ引っかかってしまうためです)
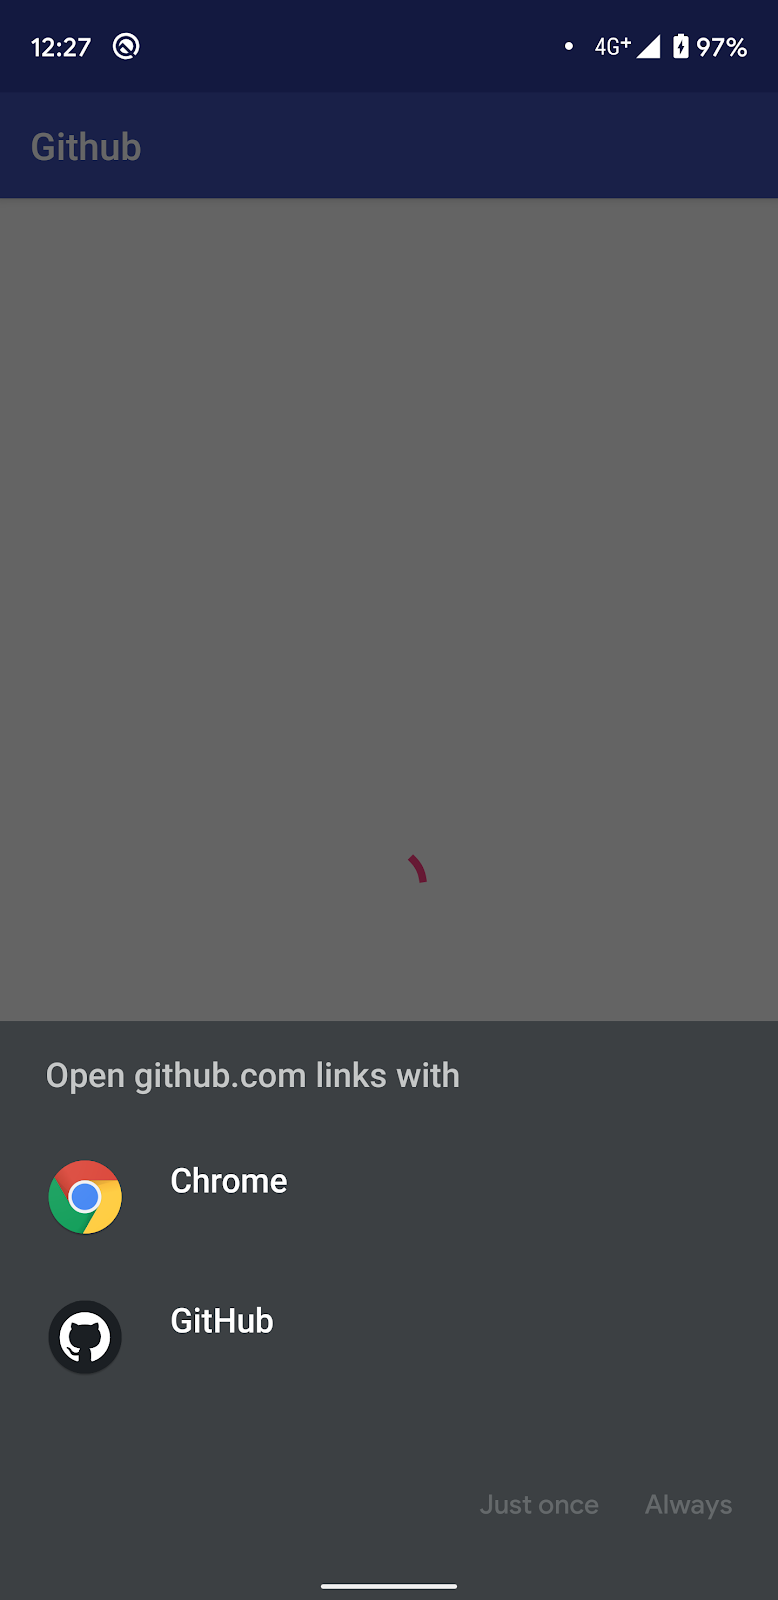
下記のようなgithub.comを開くアプリを選択する画面が表示された場合、Chromeを選択してGitHubにログインしてください。
このサンプルアプリは、GitHubのリポジトリを検索することができます。
試しに、「droidkaigi」で検索してみましょう。
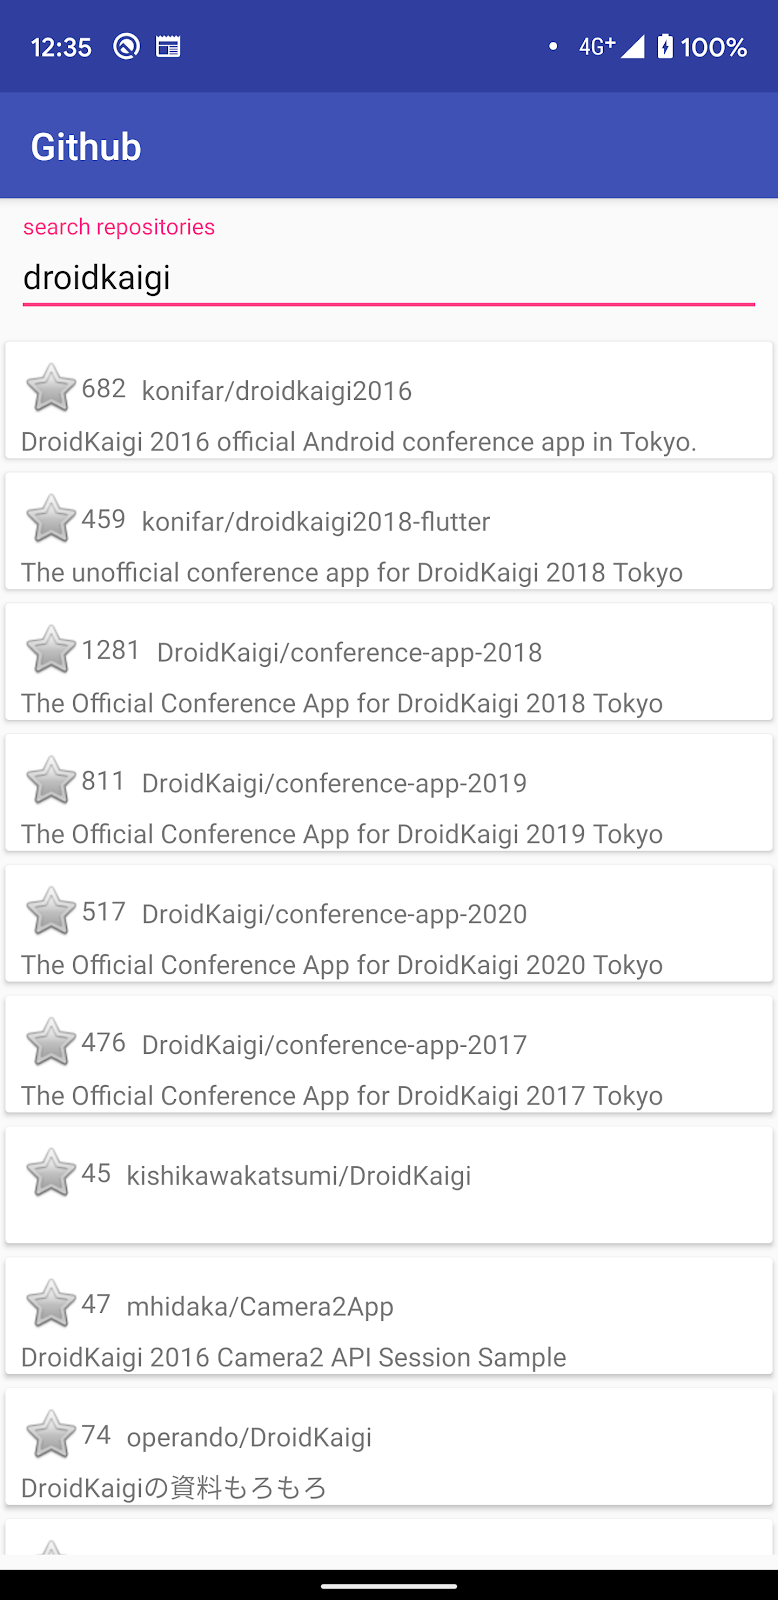
無事にリポジトリの検索結果が表示されるはずです。
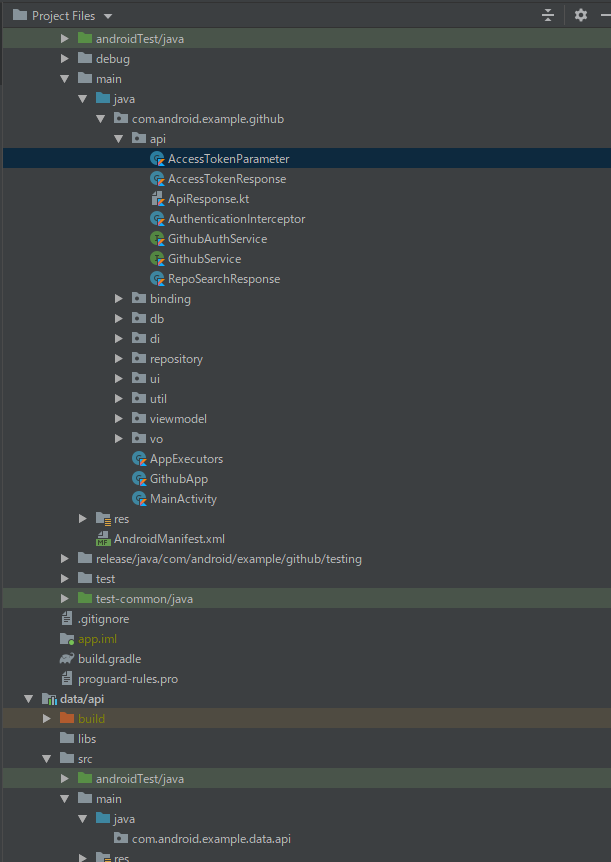
それでは、まずapiを別moduleに分割してみましょう。
ディレクトリ構造はDroidKaigi/conference-app-2020を参考に、dataディレクトリにapiやrepositoryといったmoduleを配置していきます。
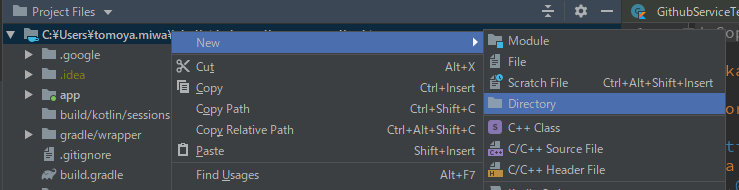
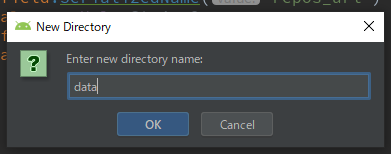
dataディレクトリの作成
まず、dataディレクトリを作成します。
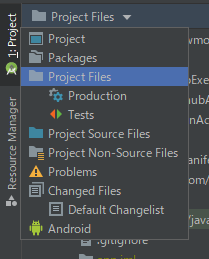
作業がしやすいようにProjectのViewをProject Filesに切り替えておきます。
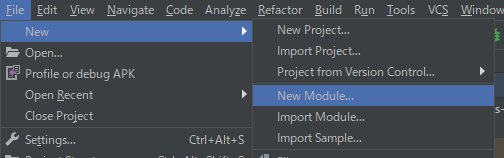
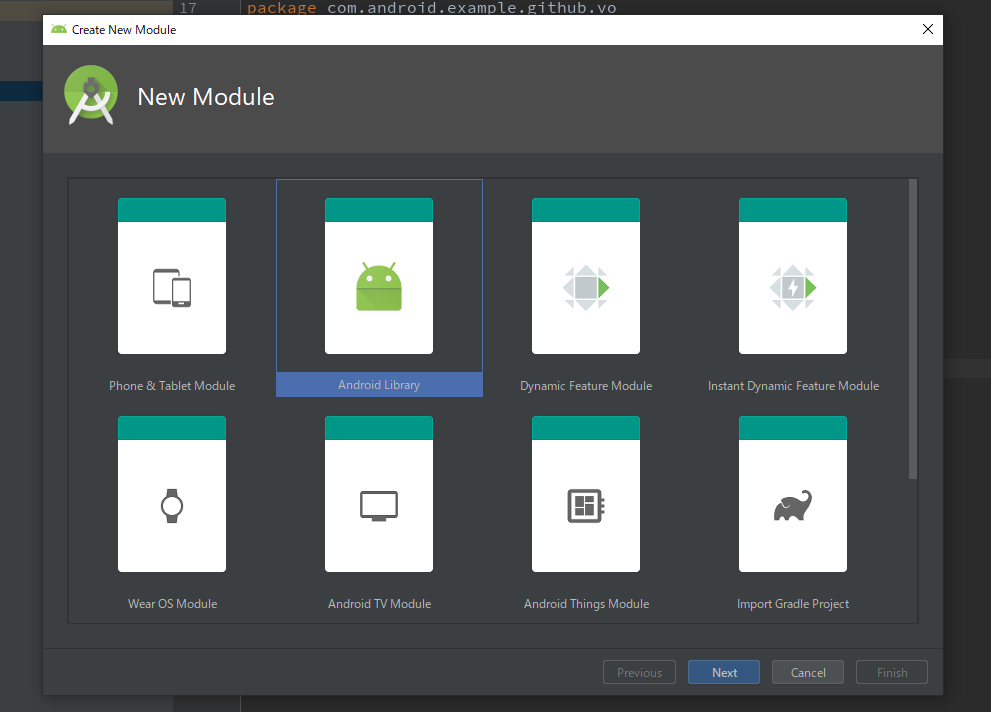
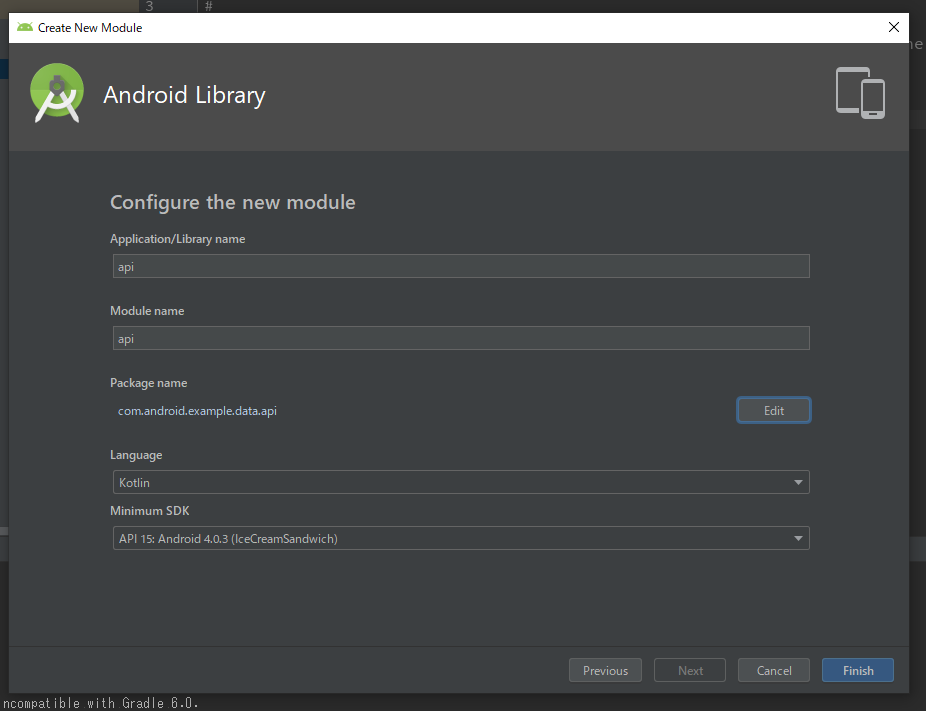
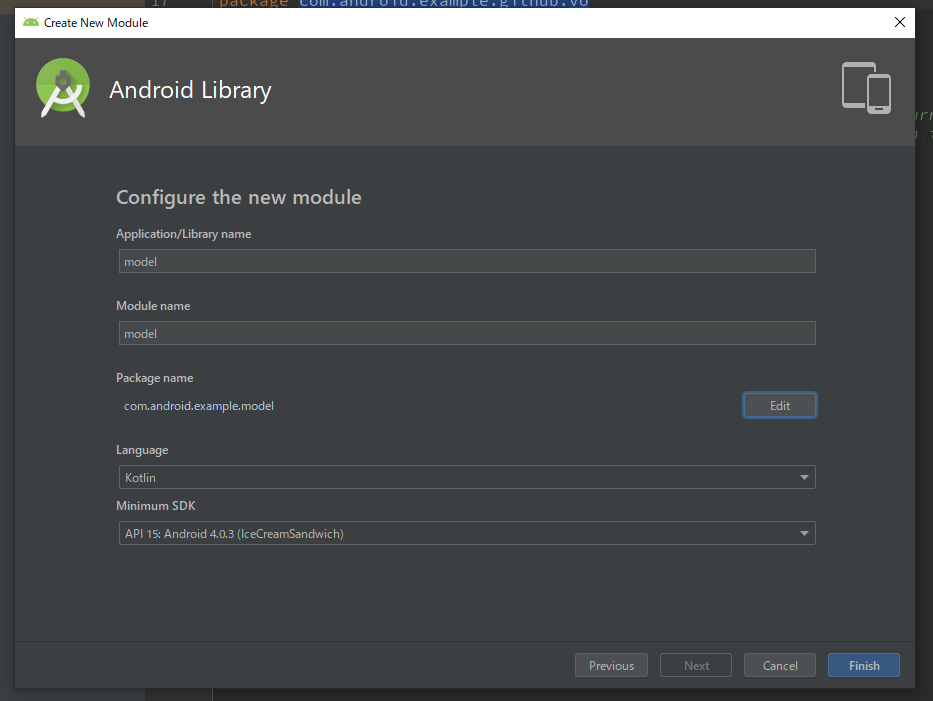
apiモジュールの作成
package nameはcom.android.example.data.apiで作成します。
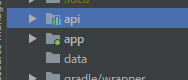
apiモジュールをdataディレクトリに移動
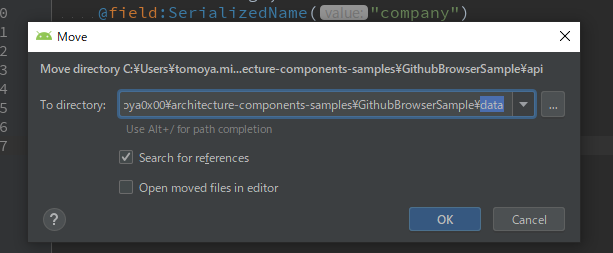
settings.gradleにも反映しておきましょう。その後、ビルドが通るか確認しておきましょう。
settings.gradle
include ':app',
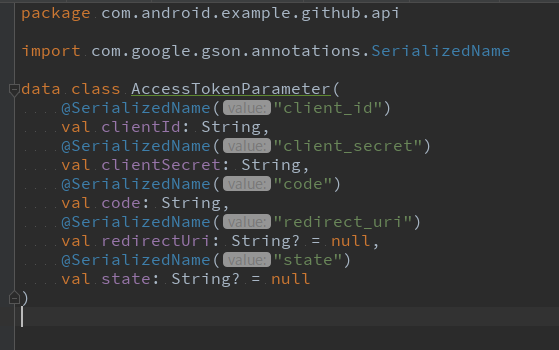
':data:api'AccessTokenParamaterをdata/api moduleに移動を試みる
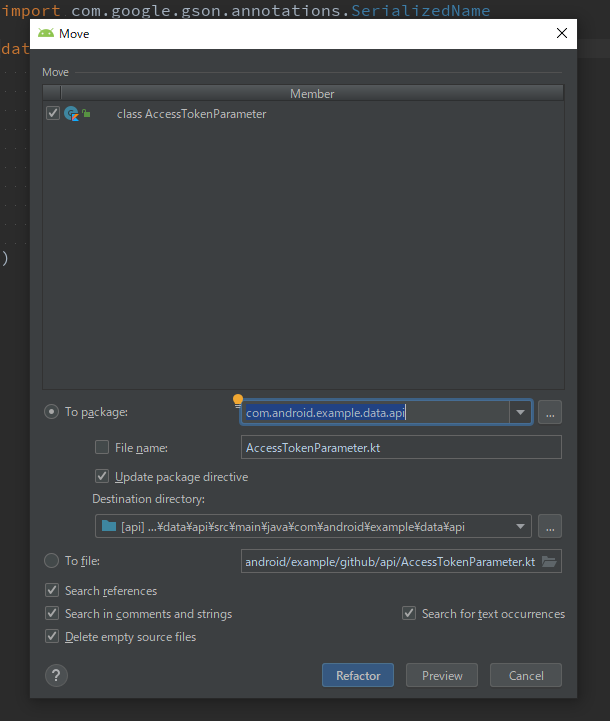
AccessTokenParameterをドラッグ・アンド・ドロップで、data/api/src/main/java/com.android.example.data.apiに移動してみます。
下記の画面が表示されるので、Refactorを押します。
しかし、下記の問題が検出され、本当に移動するのか確認されます。
ここでは内容を見てからCancelを押しましょう。
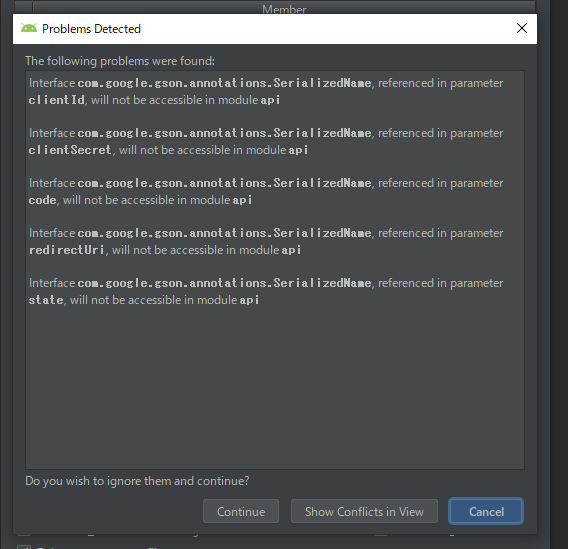
問題の原因と解決
何が問題なのでしょうか?
com.google.gson.annotations.SerializedNameを参照しているが、これをdata/api moduleは知らないのが問題です。
data/apiのbuild.gradleを開き、依存を追加していきます。
ここでは、app moduleのcom.android.example.github.apiパッケージ配下のクラスが依存しているライブラリを追加しましょう。
app/build.gradleを参考にdata/api/build.gradleファイル全体を下記の様に書き換えます。
data/api/build.gradle
apply plugin: 'com.android.library'
apply plugin: 'kotlin-android'
apply plugin: 'kotlin-android-extensions'
apply plugin: 'kotlin-kapt'

android {
    compileSdkVersion build_versions.target_sdk
    buildToolsVersion build_versions.build_tools

    defaultConfig {
        minSdkVersion build_versions.min_sdk
        targetSdkVersion build_versions.target_sdk
        versionCode 1
        versionName "1.0"

        testInstrumentationRunner "androidx.test.runner.AndroidJUnitRunner"
        consumerProguardFiles 'consumer-rules.pro'
    }

    buildTypes {
        release {
            minifyEnabled false
            proguardFiles getDefaultProguardFile('proguard-android-optimize.txt'), 'proguard-rules.pro'
        }
    }

}

dependencies {
    implementation deps.lifecycle.livedata_ktx
    implementation deps.kotlin.stdlib
    api deps.retrofit.runtime
    implementation deps.retrofit.gson
    implementation deps.timber

    implementation deps.dagger.runtime
    kapt deps.dagger.compiler

    androidTestImplementation deps.atsl.ext_junit
    androidTestImplementation deps.espresso.core

    testImplementation deps.junit
}
app/build.gradleに、data/api moduleへの依存を追加します。
addというコメントがある行が、追加した行です。Gradle Syncをお忘れ無く!
app/build.gradle
dependencies {
    implementation project(":data:api") // add

    implementation deps.app_compat
    implementation deps.recyclerview
念のため、ビルドが通ることを確認しておきましょう。
AccessTokenParameterのdata/apiへの移動を再チャレンジ
試して見て下さい!今度は無事に成功します。
同様にApiResponseとAccessTokenResponse、GithuthAuthServiceも移動しておきましょう。
移動後は、ビルドが通ることを確認しておきましょう。module分割作業中は、こまめにビルドが通るか確認することをお勧めします。
残りのクラスはどうするのか?
勘の良い方はお気づきかもしれませんが、残りのapiパッケージ配下のクラスはこのままではdata/api moduleに移動できません。
app module 内の別のクラスに依存しているからです。
それでは、次のセクションで残りのクラスをmodule分割できるようにしていきましょう。
GithubServiceとRepoSearchResponseはcom.android.example.github.vo配下のクラスに依存しています。
ここでは各module間でデータの受け渡しに使用する共通クラスの置き場所としてmodel moduleを導入。GithubServiceとRepoSearchResponseのapp moduleへの依存を切り離し、data/api moduleへの移動を可能とします。
model moduleの追加
初めてのmodule分割の手順を参考に、projectのrootにmodel moduleを追加します。
package nameはcom.android.example.modelで作成します。
build.gradleの編集
com.android.example.github.vo配下のクラスが依存しているライブラリを、mode/build.gradleに記述します。
model/build.gradleファイル全体を下記の様に書き換えて下さい。
model/build.gradle
apply plugin: 'com.android.library'
apply plugin: 'kotlin-android'
apply plugin: 'kotlin-android-extensions'
apply plugin: 'kotlin-kapt'

android {
    compileSdkVersion build_versions.target_sdk
    buildToolsVersion build_versions.build_tools

    defaultConfig {
        minSdkVersion build_versions.min_sdk
        targetSdkVersion build_versions.target_sdk
        versionCode 1
        versionName "1.0"

        testInstrumentationRunner "androidx.test.runner.AndroidJUnitRunner"
        consumerProguardFiles 'consumer-rules.pro'
    }

    buildTypes {
        release {
            minifyEnabled false
            proguardFiles getDefaultProguardFile('proguard-android-optimize.txt'), 'proguard-rules.pro'
        }
    }

}

dependencies {
    implementation deps.kotlin.stdlib

    implementation deps.retrofit.gson
    implementation deps.room.runtime

    kapt deps.room.compiler

    androidTestImplementation deps.atsl.ext_junit
    androidTestImplementation deps.espresso.core

    testImplementation deps.junit
}
app moduleとapi moduleからmodel moduleへの依存を記述します。
app/build.gradle
dependencies {
    implementation project(":model") // add
    implementation project(":data:api")
api/build.gradle
dependencies {
    api project(":model") // add

implementation deps.lifecycle.livedata_ktxmodel moduleへのクラス移動
RepoSearchResult以外のクラスは、model moduleに移動可能です。1クラスずつ移動しましょう。
RepoSearchResultはapp module内のGithubTypeConvertersに依存しているため、model moduleに移動はできません。
各クラスの依存関係に注意しながら順番にクラスを移動しましょう。
data/api moduleのクラス移動続き
これで、app moduleに残っているapi関連クラスを、AuthenticationInterceptor以外はapi moduleへ移動が可能になりました。
試しにGithubServiceのimport文をみてみましょう。
import androidx.lifecycle.LiveData
import com.android.example.data.api.ApiResponse
import com.android.example.model.Contributor
import com.android.example.model.Repo
import com.android.example.model.User
import retrofit2.Call
import retrofit2.http.GET
import retrofit2.http.Path
import retrofit2.http.Query
LiveDataやretrofit2など公開されているライブラリ以外には、library moduleのimport文しか存在しません。
それでは、RepoSearchResponseとGithubServiceをdata/api moduleに移動しましょう。
Data binding compilerのエラー解消
この状態でビルドすると、Data binding compilerで下記のエラーが発生します。
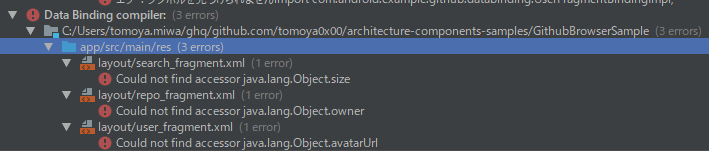
Android Studioのリファクタリング機能のバグなのか、
layoutファイル内のvariableのtypeが適切に書き換えられていません。
エラーが出ているレイアウトファイルを修正しましょう。
search_fragment.xmlの修正
      <variable
            name="searchResult"
            type="com.android.example.model.Resource" />
を
<variable
name="searchResult"
type="LiveData<Resource<List<Repo>>>" />に変更します。
repo_fragment.xmlの修正
      <variable
            name="repo"
            type="com.android.example.model.Resource" />
を
<variable
name="repo"
type="LiveData<Resource<Repo>>>" />に変更します。
user_fragment.xmlの修正
      <variable
            name="user"
            type="com.android.example.model.Resource" />
を
<variable
name="user"
type="LiveData<Resource<User>>" />に変更します。
これで、api関連クラスでdata/api moduleに移動できていないのはAuthenticationInterceptorだけになりました。
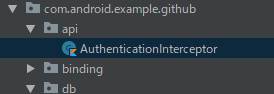
AuthenticationInterceptorはAccessTokenRepositoryに依存しているので、今度はreposiotry moduleを作りましょう。
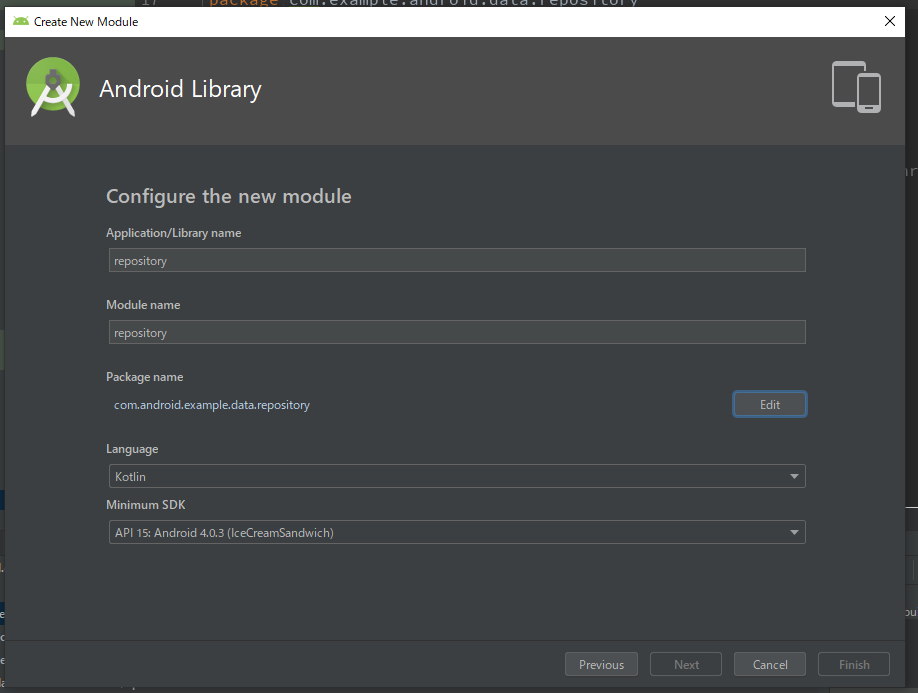
初めてのmodule分割の手順を参考に、repository moduleを作ります。
package nameはcom.android.example.data.repositoryで作成します。
repisotry moduleはdataディレクトリに移動し、settings.gradle内の名称も変更しておきましょう。
settings.gradle
include ':app',
        ':model',
        ':data:repository',
        ':data:api'
data/repository moduleへAccessTokenRepositoryを移動
全てのreposiotry関連クラスを一度にdata/repository moduleへ移動するのは大変なので、まずは依存しているものが少ないAccessTokenRepositoryだけをdata/repository moduleへ移動します。
まず、data/repository/build.gradleを変更します。そして、app moduleからdata/repository moduleを参照します。
data/repository/build.gradleファイル全体を下記の様に書き換えて下さい。
data/repository/build.gradle
apply plugin: 'com.android.library'
apply plugin: 'kotlin-android'
apply plugin: 'kotlin-android-extensions'
apply plugin: 'kotlin-kapt'

android {
    compileSdkVersion build_versions.target_sdk
    buildToolsVersion build_versions.build_tools

    defaultConfig {
        minSdkVersion build_versions.min_sdk
        targetSdkVersion build_versions.target_sdk
        versionCode 1
        versionName "1.0"

        testInstrumentationRunner "androidx.test.runner.AndroidJUnitRunner"
        consumerProguardFiles 'consumer-rules.pro'
    }
   compileOptions {
        sourceCompatibility JavaVersion.VERSION_1_8
        targetCompatibility JavaVersion.VERSION_1_8
    }
    kotlinOptions {
        jvmTarget = "1.8"
    }
    buildTypes {
        release {
            minifyEnabled false
            proguardFiles getDefaultProguardFile('proguard-android-optimize.txt'), 'proguard-rules.pro'
        }
    }

}

dependencies {
    api project(":model")

    implementation deps.core_ktx
    implementation deps.lifecycle.livedata_ktx
    implementation deps.kotlin.stdlib

    implementation deps.dagger.runtime
    kapt deps.dagger.compiler

    implementation deps.kotpref.core
    implementation deps.kotpref.initializer

    androidTestImplementation deps.atsl.ext_junit
    androidTestImplementation deps.espresso.core

    testImplementation deps.junit
}
app moduleからdata/repository moduleへの依存を記述します。
app/build.gradle
dependencies {
    implementation project(":model")
    implementation project(":data:api")
    implementation project(":data:repository") // add

    implementation deps.app_compat
    implementation deps.recyclerview
これで、AccessTokenRepositoryをdata/repository moduleへ移動できます。
AuthenticationInterceptorをどのmoduleに配置するか
では、AuthenticationInterceptorをdata/api moduleに移動し、api moduleからdata/repository moduleに依存させれば良いでしょうか。いえ、そう簡単にはいきません。
repository moduleからapi moduleを参照し、repositoryでapiアクセスを隠蔽したいところですが、module間の依存で循環参照はおこなえません。
この場合、いくつかの対策が考えられますが、今回はGithubServiceとGithubAuthServiceをbuildするapi-builder moduleを追加し、ここにAuthenticationInterceptorを移動します。
そうすると、各moduleの依存関係が循環するのを防ぐことができます。
実際にやってみましょう。
api-builder moduleを追加
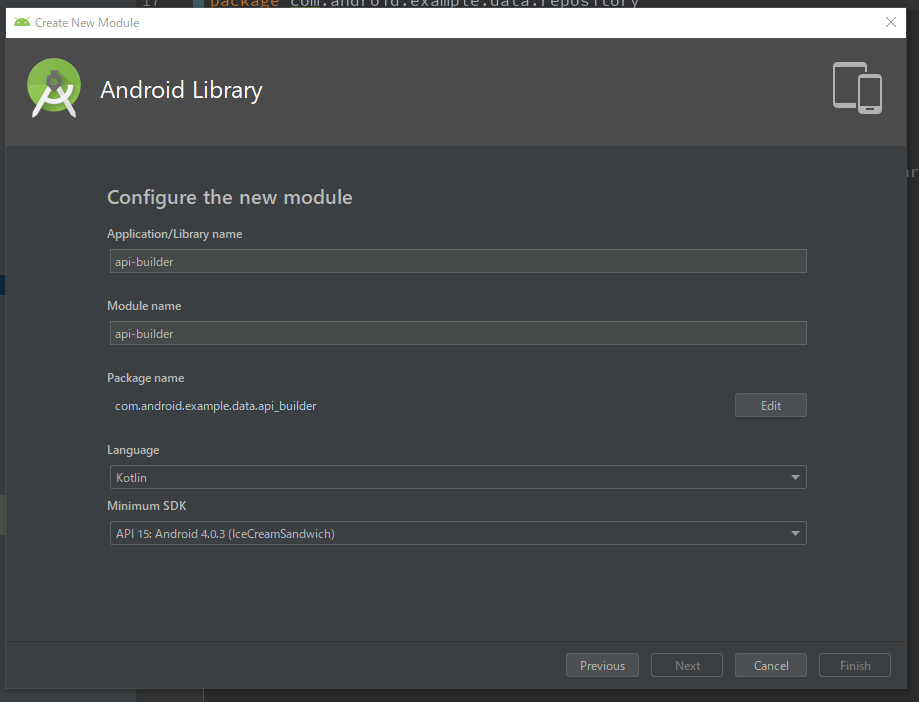
初めてのmodule分割の手順を参考に、api-builder moduleを作ります。
package nameはcom.android.example.data.api_builderで作成します。
api-builder moduleはdataディレクトリに移動し、settings.gradle内の名称も変更しておきましょう。
settings.gradle
include ':app',
        ':model',
        ':data:repository',
        ':data:api',
        ':data:api-builder'
data/api-builder/build.gradleファイル全体を下記の様に書き換えて下さい。
data/api-builder/build.gradle
apply plugin: 'com.android.library'
apply plugin: 'kotlin-android'
apply plugin: 'kotlin-android-extensions'
apply plugin: 'kotlin-kapt'

android {
    compileSdkVersion build_versions.target_sdk
    buildToolsVersion build_versions.build_tools

    defaultConfig {
        minSdkVersion build_versions.min_sdk
        targetSdkVersion build_versions.target_sdk
        versionCode 1
        versionName "1.0"

        testInstrumentationRunner "androidx.test.runner.AndroidJUnitRunner"
        consumerProguardFiles 'consumer-rules.pro'
    }

    buildTypes {
        release {
            minifyEnabled false
            proguardFiles getDefaultProguardFile('proguard-android-optimize.txt'), 'proguard-rules.pro'
        }
    }

}

dependencies {
    api project(":data:api")
    implementation project(":data:repository")

    implementation deps.lifecycle.livedata_ktx
    implementation deps.kotlin.stdlib
    implementation deps.retrofit.runtime
    implementation deps.retrofit.gson
    api deps.okhttp_logging_interceptor

    implementation deps.dagger.runtime
    kapt deps.dagger.compiler

    androidTestImplementation deps.atsl.ext_junit
    androidTestImplementation deps.espresso.core

    testImplementation deps.junit
}
app moduleからdata/api-builder moduleへの依存を書いておきます。
app/build.gradle
dependencies {
    implementation project(":model")
    implementation project(":data:api")
    implementation project(":data:api-builder") // add
    implementation project(":data:repository")

    implementation deps.app_compat
    implementation deps.recyclerview
AuthenticationInterceptorをdata/api-builder moduleに移動します。
AppModuleの処理の一部を別クラスに切り出し
AppModule#provideGithubService と AppModule#provideGithubAuthService の処理を他のクラスに切り出し、これをdata/api-builder moduleに移動しましょう。ここでは、 ApiBuilderというクラスをapp moduleに作ります。
ApiBuilder
class ApiBuilder @Inject constructor(
    private val authenticationInterceptor: AuthenticationInterceptor
) {
    fun buildGithubService(
        baseUrl: String,
        loggingLevel: HttpLoggingInterceptor.Level
    ): GithubService {
        val client = OkHttpClient.Builder()
            .addNetworkInterceptor(HttpLoggingInterceptor().apply { level = loggingLevel })
            .addInterceptor(authenticationInterceptor)
            .build()

        return Retrofit.Builder()
            .baseUrl(baseUrl)
            .addConverterFactory(GsonConverterFactory.create())
            .addCallAdapterFactory(LiveDataCallAdapterFactory())
            .client(client)
            .build()
            .create(GithubService::class.java)
    }

    fun buildGithubAuthService(
        baseUrl: String
    ): GithubAuthService {
        return Retrofit.Builder()
            .baseUrl(baseUrl)
            .addConverterFactory(GsonConverterFactory.create())
            .build()
            .create(GithubAuthService::class.java)
    }
}
AppModule で ApiBuilder を使用するように書き換えます。
AppModule
   @Singleton
    @Provides
    fun provideGithubService(
        apiBuilder: ApiBuilder
    ): GithubService {
        return apiBuilder.buildGithubService(
            baseUrl = "https://api.github.com/",
            loggingLevel = HttpLoggingInterceptor.Level.BODY
        )
    }

    @Singleton
    @Provides
    fun provideGithubAuthService(
        apiBuilder: ApiBuilder
    ): GithubAuthService {
        return apiBuilder.buildGithubAuthService(
            baseUrl = "https://github.com/"
        )
    }
これで
- LiveDataCallAdapter
- LiveDataCallAdapterFactory
- ApiBuilder
をapi-builder moduleへ移動できます。移動してください。
次は、残りのrepository関連クラスをdata/repository moduleに移動するため、それらが依存しているdb関係のクラス用のmoduleとしてdata/db moduleを導入し、移動していきましょう。
db moduleの追加
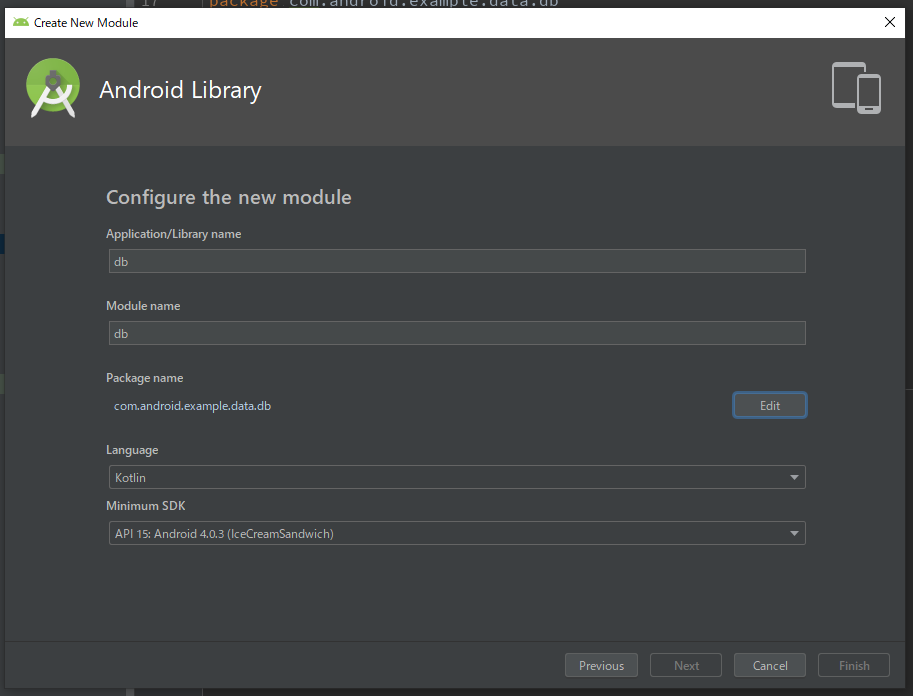
初めてのmodule分割の手順を参考に、db moduleを作ります。
package nameはcom.android.example.data.dbで作成します。
db moduleはdataディレクトリに移動し、settings.gradle内の名称も変更しておきましょう。
settings.gradle
include ':app',
        ':model',
        ':data:db',
        ':data:repository',
        ':data:api',
        ':data:api-builder'
次に、db関係クラスと各repositoryクラスが依存しているOpenForTestingアノテーションを、各moduleから参照できるようにします。
OpenForTesting用のmoduleを作成、各々のmoduleからの依存関係を記述します。
ただし、OpenForTestingはreleaseとdebugで実装が異なるので、moduleも二つ作成します。
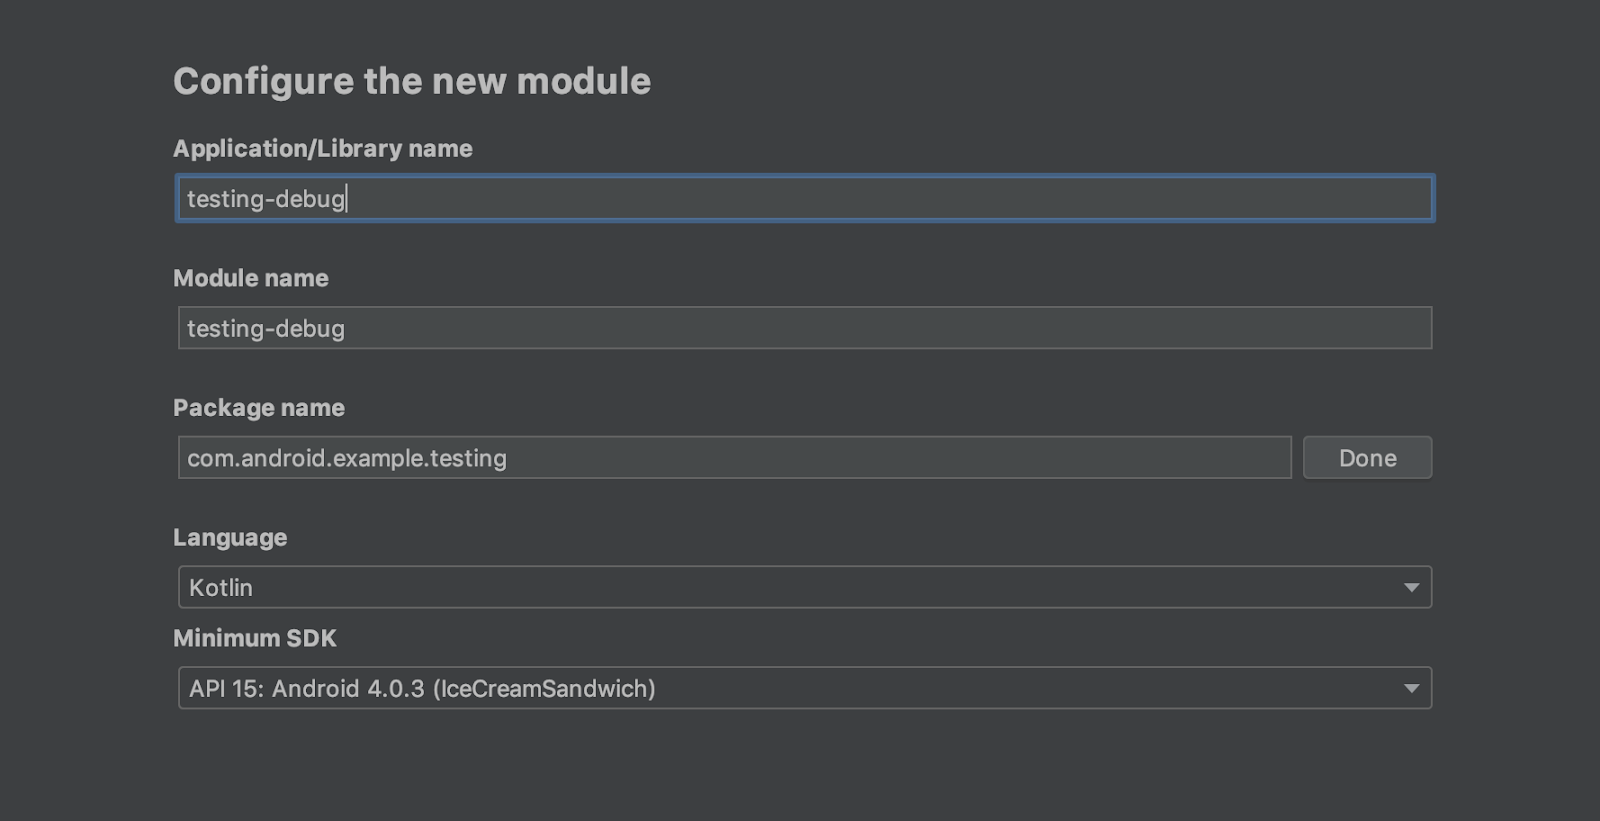
testing-release moduleとtesting-debug moduleの追加
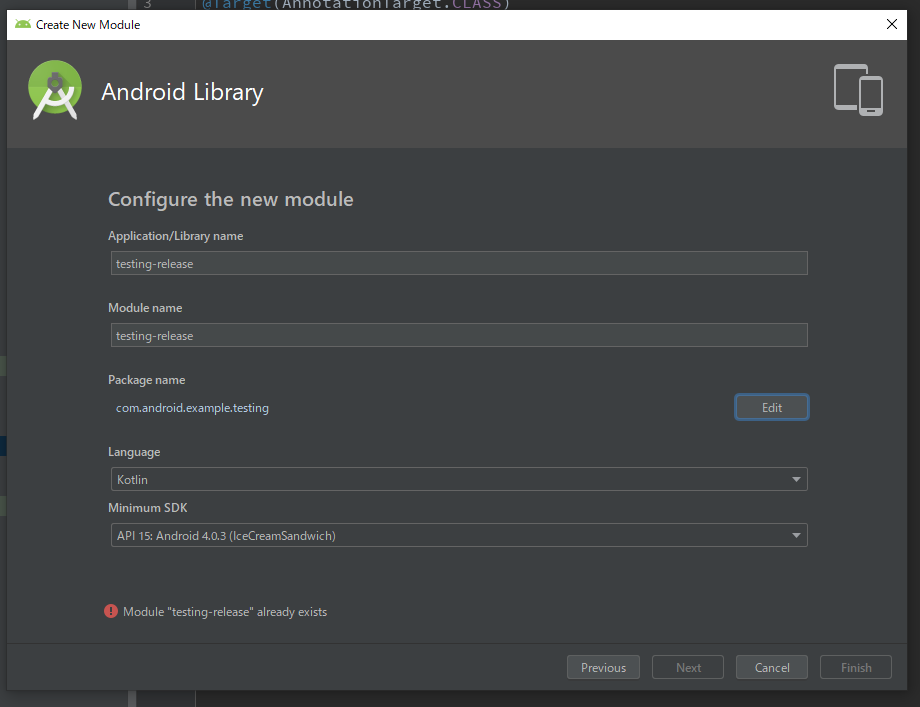
初めてのmodule分割の手順を参考に、testing-release moduleとtesting-debug moduleを作ります。
どちらもpackage nameはcom.android.example.testingで作成します。
それぞれのbuild.gradleファイル全体を下記の様に書き換えて下さい。
testing-release/build.gradle と testing-debug/build.gradle
apply plugin: 'com.android.library'
apply plugin: 'kotlin-android'
apply plugin: 'kotlin-android-extensions'

android {
    compileSdkVersion build_versions.target_sdk
    buildToolsVersion build_versions.build_tools

    defaultConfig {
        minSdkVersion build_versions.min_sdk
        targetSdkVersion build_versions.target_sdk
        versionCode 1
        versionName "1.0"

        testInstrumentationRunner "androidx.test.runner.AndroidJUnitRunner"
        consumerProguardFiles 'consumer-rules.pro'
    }

    buildTypes {
        release {
            minifyEnabled false
            proguardFiles getDefaultProguardFile('proguard-android-optimize.txt'), 'proguard-rules.pro'
        }
    }

}

dependencies {
    implementation deps.kotlin.stdlib

    androidTestImplementation deps.atsl.ext_junit
    androidTestImplementation deps.espresso.core

    testImplementation deps.junit
}
各moduleのbuild.gradleにtesting-release moduleとtesting-debug moduleへの依存を追加します。
app moduleからdata/db moduleへの依存も追加します。
また、data/repository moduleからdata/api moduleへの依存を記入します。
app/build.gradle
dependencies {
    implementation project(":model")
    implementation project(":data:api")
    implementation project(":data:api-builder")
    implementation project(":data:repository")
    implementation project(":data:db") // add
    releaseImplementation project(":testing-release") // add
    debugImplementation project(":testing-debug") // add
data/db/build.gradle
apply plugin: 'com.android.library'
apply plugin: 'kotlin-android'
apply plugin: 'kotlin-android-extensions'
apply plugin: 'kotlin-kapt'

android {
    compileSdkVersion build_versions.target_sdk
    buildToolsVersion build_versions.build_tools

    defaultConfig {
        minSdkVersion build_versions.min_sdk
        targetSdkVersion build_versions.target_sdk
        versionCode 1
        versionName "1.0"

        testInstrumentationRunner "androidx.test.runner.AndroidJUnitRunner"
        consumerProguardFiles 'consumer-rules.pro'
    }
    compileOptions {
        sourceCompatibility JavaVersion.VERSION_1_8
        targetCompatibility JavaVersion.VERSION_1_8
    }
    kotlinOptions {
        jvmTarget = "1.8"
    }
    buildTypes {
        release {
            minifyEnabled false
            proguardFiles getDefaultProguardFile('proguard-android-optimize.txt'), 'proguard-rules.pro'
        }
    }

}

dependencies {
    api project(":model")
    releaseImplementation project(":testing-release")
    debugImplementation project(":testing-debug")

    implementation deps.lifecycle.livedata_ktx
    api deps.room.runtime
    implementation deps.kotlin.stdlib
    implementation deps.timber

    kapt deps.room.compiler

    androidTestImplementation deps.atsl.ext_junit
    androidTestImplementation deps.espresso.core

    testImplementation deps.junit
}
data/reposiotry/build.gradle
dependencies {
    api project(":model")
    releaseImplementation project(":testing-release") // add
    debugImplementation project(":testing-debug") // add
    implementation project(":data:api") // add

    implementation deps.core_ktx
    implementation deps.lifecycle.livedata_ktx
    implementation deps.kotlin.stdlib
次にBuild Variantsをreleaseにして、app/src/release に格納されているOpenForTesting.ktをtesting-release moduleへ移動します。
Android Studioのリファクタリング機能は、現在有効なBuild Variantsでしか機能しないため、注意して下さい。

次に、Build Variantsをdebugに戻して、app/src/debug に格納されているOpenForTesting.ktをtesting-debug moduleへ移動します。

念のため、releaseとdebugの両方のBuild Variantsでビルドが成功するか確認しておきましょう。
db関係のクラスをdata/db moduleに移動
RepoSearchResultと、com.android.example.github.db配下のクラスを、全てdb moduleに移動します。
さて、他にrepositoryクラス達が依存しているクラスには何があるでしょうか?
あとはAppExecutorsを別moduleに切り出せば、repositoryクラス達をdata/repository moduleに移動できそうです。
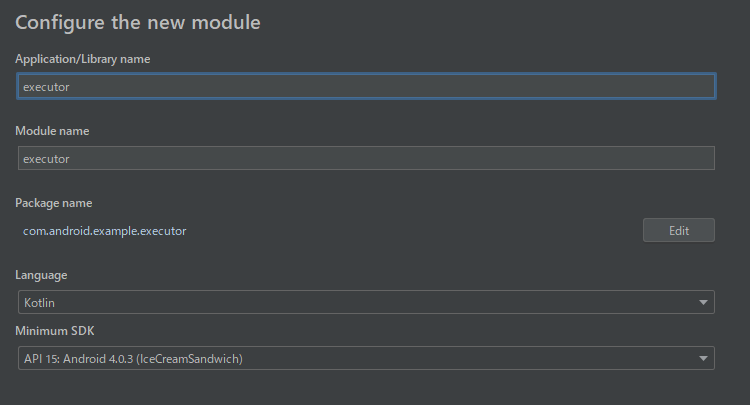
executor moduleの追加
AppExecutorsはexecutor moduleを作り、そちらに移動しましょう。
初めてのmodule分割の手順を参考に、executor moduleを作ります。
package nameはcom.android.example.executorで作成します。
repository moduleとapp moduleをexecutor moduleに依存させます。
data/repository/build.gradle
dependencies {
    api project(":model")
    releaseImplementation project(":testing-release")
    debugImplementation project(":testing-debug")
    implementation project(":data:api")
    implementation project(":executor") // add

    implementation deps.core_ktx
    implementation deps.lifecycle.livedata_ktx
app/build.gradle
dependencies {
    implementation project(":model")
    implementation project(":data:api")
    implementation project(":data:api-builder")
    implementation project(":data:repository")
    implementation project(":data:db")
    releaseImplementation project(":testing-release")
    debugImplementation project(":testing-debug")
    implementation project(":executor") // add

    implementation deps.app_compat
executor moduleにAppExecutorsを移動する前準備として、executor/build.gradleファイル全体を下記の様に書き換えて下さい。
executor/build.gradle
apply plugin: 'com.android.library'
apply plugin: 'kotlin-android'
apply plugin: 'kotlin-android-extensions'
apply plugin: 'kotlin-kapt'

android {
    compileSdkVersion build_versions.target_sdk
    buildToolsVersion build_versions.build_tools

    defaultConfig {
        minSdkVersion build_versions.min_sdk
        targetSdkVersion build_versions.target_sdk
        versionCode 1
        versionName "1.0"

        testInstrumentationRunner "androidx.test.runner.AndroidJUnitRunner"
        consumerProguardFiles 'consumer-rules.pro'
    }

    buildTypes {
        release {
            minifyEnabled false
            proguardFiles getDefaultProguardFile('proguard-android-optimize.txt'), 'proguard-rules.pro'
        }
    }

}

dependencies {
    implementation deps.kotlin.stdlib

    implementation deps.dagger.runtime
    kapt deps.dagger.compiler

    androidTestImplementation deps.atsl.ext_junit
    androidTestImplementation deps.espresso.core

    testImplementation deps.junit
}
AppExecutorsをexecutor moduleに移動します。
repository関連クラスをdata/repository moduleに移動
各repositoryクラスが依存しているAbsentLiveDataとRateLimiterを先にdata/repository moduleに移動してください。
そして、data/repository moduleをdata/db moduleへ依存させます。
data/repository/build.gradle
dependencies {
    api project(":model")
    releaseImplementation project(":testing-release")
    debugImplementation project(":testing-debug")
    implementation project(":data:api")
    implementation project(":data:db") // add
    implementation project(":executor")

    implementation deps.core_ktx
    implementation deps.lifecycle.livedata_ktx
その後にcom.android.example.github.repository配下のクラスを全てrepository moduleに移動します。
これで、app moduleからそれぞれ下記のlibrary moduleに分割することができました。
- executor
- testing-release
- testing-debug
- model
- data/db
- data/repository
- data/api
- data/api-builder
これまでのmodule分割では画面を含まないクラスばかりを対象としていました。
今回はログイン画面をmodule分割してみましょう。
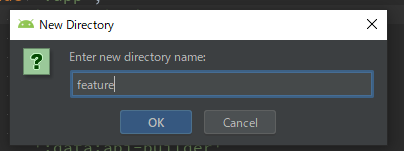
featureディレクトリの作成
dataディレクトリと同じように、featureディレクトリを作成しましょう。
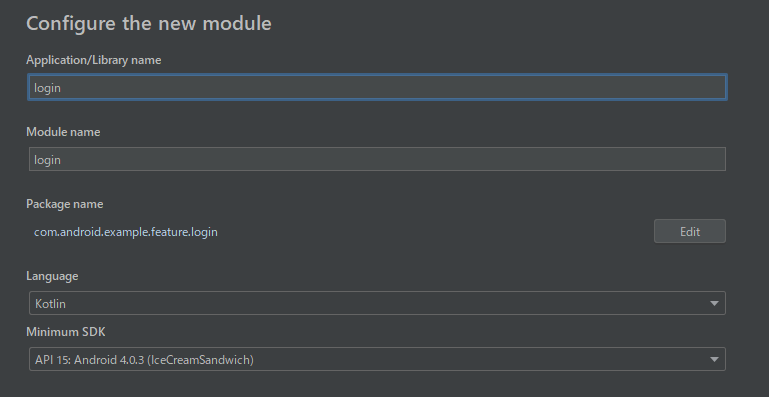
login moduleの追加
package nameはcom.android.example.feature.loginで作成します。
login moduleはfeatureディレクトリに移動し、settings.gradle内の名称も変更しておきましょう。
settings.gradle
include ':app',
        ':feature:login',
        ':executor',
        ':testing-release',
        ':testing-debug',
        ':model',
        ':data:db',
        ':data:repository',
        ':data:api',
        ':data:api-builder'
feature/login moduleにはLoginActivityとLoginHelperを移動します。
あらかじめ、これを考慮してfeature/login moduleのbuild.gradleファイル全体を下記の様に書き換えます。
feature/login/build.gradle
apply plugin: 'com.android.library'
apply plugin: 'kotlin-android'
apply plugin: 'kotlin-android-extensions'
apply plugin: 'kotlin-kapt'

android {
    compileSdkVersion build_versions.target_sdk
    buildToolsVersion build_versions.build_tools

    defaultConfig {
        minSdkVersion build_versions.min_sdk
        targetSdkVersion build_versions.target_sdk
        versionCode 1
        versionName "1.0"

        testInstrumentationRunner "androidx.test.runner.AndroidJUnitRunner"
        consumerProguardFiles 'consumer-rules.pro'
    }

    buildTypes {
        release {
            minifyEnabled false
            proguardFiles getDefaultProguardFile('proguard-android-optimize.txt'), 'proguard-rules.pro'
        }
    }

}

dependencies {
    implementation project(":model")
    implementation project(":data:api")
    implementation project(":data:repository")

    implementation deps.app_compat
    implementation deps.lifecycle.livedata_ktx
    implementation deps.lifecycle.runtime_ktx
    implementation deps.browser
    implementation deps.kotlin.stdlib
    implementation deps.coroutines.android
    implementation deps.timber

    implementation deps.dagger.runtime
    kapt deps.dagger.compiler
    kapt deps.lifecycle.compiler

    androidTestImplementation deps.atsl.ext_junit
    androidTestImplementation deps.espresso.core

    testImplementation deps.junit
}
app moduleからfeature/login moduleへの依存性を記述しておきます。
app/build.gradle
dependencies {
    implementation project(":model")
    implementation project(":data:api")
    implementation project(":data:api-builder")
    implementation project(":data:repository")
    implementation project(":data:db")
    releaseImplementation project(":testing-release")
    debugImplementation project(":testing-debug")
    implementation project(":executor")

    implementation project(":feature:login") // add

    implementation deps.app_compat
    implementation deps.recyclerview
app moduleのBuildConfigをlibrary moduleから参照できない
LoginHelperでは下記のBuildConfigを参照しています。
- GITHUB_CLIENT_ID
- GITHUB_CLIENT_SECRET
しかし、これはあくまでapp module側で定義しているBuildConfigなので、LoginHelperをfeature/login moduleに移動すると参照できません。
今回はBuildConfigをラップして提供するためのEnvVarというinterfaceを定義し、これをenvvar moduleに配置。EnvVarの実装自体はapp moduleでおこなう、という方法で対処します。
envvar moduleの追加
package nameはcom.android.example.envvarで作成します。
envvar/build.gradleファイル全体を下記の様に書き換えます。
envvar/build.gradle
apply plugin: 'com.android.library'
apply plugin: 'kotlin-android'
apply plugin: 'kotlin-android-extensions'
apply plugin: 'kotlin-kapt'

android {
    compileSdkVersion build_versions.target_sdk
    buildToolsVersion build_versions.build_tools

    defaultConfig {
        minSdkVersion build_versions.min_sdk
        targetSdkVersion build_versions.target_sdk
        versionCode 1
        versionName "1.0"

        testInstrumentationRunner "androidx.test.runner.AndroidJUnitRunner"
        consumerProguardFiles 'consumer-rules.pro'
    }

    buildTypes {
        release {
            minifyEnabled false
            proguardFiles getDefaultProguardFile('proguard-android-optimize.txt'), 'proguard-rules.pro'
        }
    }

}

dependencies {
    implementation deps.kotlin.stdlib

    androidTestImplementation deps.atsl.ext_junit
    androidTestImplementation deps.espresso.core

    testImplementation deps.junit
}
feature/login moduleとapp moduleをenvvar moduleに依存させます。
feature/login/build.gradle
dependencies {
    implementation project(":model")
    implementation project(":data:api")
    implementation project(":data:repository")
    implementation project(":envvar") // add

    implementation deps.app_compat
    implementation deps.lifecycle.livedata_ktx
app/build.gradle
dependencies {
    implementation project(":model")
    implementation project(":data:api")
    implementation project(":data:api-builder")
    implementation project(":data:repository")
    implementation project(":data:db")
    releaseImplementation project(":testing-release")
    debugImplementation project(":testing-debug")
    implementation project(":executor")
    implementation project(":envvar") // add

    implementation project(":feature:login")

    implementation deps.app_compat
次に、envvar moduleにEnvVar interfaceを追加します。
EnvVar
package com.android.example.envvar

interface EnvVar {
    val GITHUB_CLIENT_ID: String
    val GITHUB_CLIENT_SECRET: String
}
AppModuleでEnvVarを実装し、提供します。
AppModule
    @Singleton
    @Provides
    fun provieEnvVar(): EnvVar {
        return object : EnvVar {
            override val GITHUB_CLIENT_ID = BuildConfig.GITHUB_CLIENT_ID
            override val GITHUB_CLIENT_SECRET = BuildConfig.GITHUB_CLIENT_SECRET
        }
    }
LoginHelperはBuildConfigを直接参照するのを辞め、代わりにEnvVarを使うように変更します。
ここでのBuildConfigはcom.android.example.github.BuildConfigを参照できるようにimportしておきましょう。
LoginHelper
class LoginHelper @Inject constructor(
    private val githubAuthService: GithubAuthService,
    private val accessTokenRepository: AccessTokenRepository,
    private val envVar: EnvVar
) {
    fun generateAuthorizationUrl(): Uri =
        Uri.Builder().apply {
            scheme("https")
            authority("github.com")
            appendPath("login")
            appendPath("oauth")
            appendPath("authorize")
            appendQueryParameter("client_id", envVar.GITHUB_CLIENT_ID)
        }.build()

    suspend fun handleAuthRedirect(intent: Intent): Boolean {
        val uri = intent.data ?: return false
        if (!uri.toString().startsWith("dgbs://login")) return false
        val tempCode = uri.getQueryParameter("code") ?: return false

        Timber.i("code: $tempCode")

        val param = AccessTokenParameter(
            clientId = envVar.GITHUB_CLIENT_ID,
            clientSecret = envVar.GITHUB_CLIENT_SECRET,
            code = tempCode
        )

        return runCatching {
            val resp = githubAuthService.createAccessToken(param)
            accessTokenRepository.save(AccessToken(resp.accessToken))
        }.onFailure {
            Timber.e(it, "createAccessToken failed!")
        }.isSuccess
    }
}
これで、LoginHelperはfeature/login moduleへ移動可能です。移動しましょう。
さて、LoginActivityはInjectableというinterfaceに依存しており、このままではLoginActivityをapp moduleの外に移動することはできません。
新たにdi moduleを作成し、これにはInjectableを移動しましょう。
di moduleの追加
package nameはcom.android.example.diで作成します。
di/build.gradleファイル全体を下記の様に書き換えて下さい。
di/build.gradle
apply plugin: 'com.android.library'
apply plugin: 'kotlin-android'
apply plugin: 'kotlin-android-extensions'
apply plugin: 'kotlin-kapt'

android {
    compileSdkVersion build_versions.target_sdk
    buildToolsVersion build_versions.build_tools

    defaultConfig {
        minSdkVersion build_versions.min_sdk
        targetSdkVersion build_versions.target_sdk
        versionCode 1
        versionName "1.0"

        testInstrumentationRunner "androidx.test.runner.AndroidJUnitRunner"
        consumerProguardFiles 'consumer-rules.pro'
    }

    buildTypes {
        release {
            minifyEnabled false
            proguardFiles getDefaultProguardFile('proguard-android-optimize.txt'), 'proguard-rules.pro'
        }
    }

}

dependencies {
    implementation deps.kotlin.stdlib

    androidTestImplementation deps.atsl.ext_junit
    androidTestImplementation deps.espresso.core

    testImplementation deps.junit
}
app moduleとfeature/login moduleにdi moduleへの依存性を記述します。
app/build.gradle
dependencies {
    implementation project(":model")
    implementation project(":data:api")
    implementation project(":data:api-builder")
    implementation project(":data:repository")
    implementation project(":data:db")
    releaseImplementation project(":testing-release")
    debugImplementation project(":testing-debug")
    implementation project(":executor")
    implementation project(":envvar")
    implementation project(":di") // add

    implementation project(":feature:login")

    implementation deps.app_compat
feature/login/build.gradle
dependencies {
    implementation project(":model")
    implementation project(":data:api")
    implementation project(":data:repository")
    implementation project(":envvar")
    implementation project(":di") // add

    implementation deps.app_compat
次にInjectableをdi moduleに移動します。
これで、ようやくLoginActivityをfeaure/login moduleへ移動可能となりました。
activity_login.xml、LoginActvityの順にfeaure/login moduleへ移動しましょう。
module追加時の/build.gradle変更を戻す
Android Studio で module を追加すると、プロジェクトルートの build.gradle に不要なkotlin-gradle-plugin への依存が追加されます。削除しておきましょう。
最終的な build.gradle は下記になります。
build.gradle
buildscript {
    apply from: 'versions.gradle'
    addRepos(repositories)
    dependencies {
        classpath deps.android_gradle_plugin
        classpath deps.kotlin.plugin
        classpath deps.kotlin.allopen
        classpath deps.navigation.safe_args_plugin
        // NOTE: Do not place your application dependencies here; they belong
        // in the individual module build.gradle files
    }
}

allprojects {
    addRepos(repositories)
}


task clean(type: Delete) {
    delete rootProject.buildDir
}
app/build.gradle の不要な依存性を削除
app/build.gradleの不要な依存性も削除しましょう。いくつかの依存は各library moduleのbuild.gradleに記述があれば問題ありません。
最終的な app/build.gradle の dependencies は下記になります。
dependencies {
    implementation project(":model")
    implementation project(":data:api-builder")
    implementation project(":data:repository")
    implementation project(":data:db")
    releaseImplementation project(":testing-release")
    debugImplementation project(":testing-debug")
    implementation project(":executor")
    implementation project(":envvar")
    implementation project(":di")

    implementation project(":feature:login")

    implementation deps.app_compat
    implementation deps.recyclerview
    implementation deps.cardview
    implementation deps.material
    implementation deps.core_ktx
    implementation deps.transition
    implementation deps.navigation.fragment_ktx
    implementation deps.lifecycle.livedata_ktx
    implementation deps.lifecycle.runtime_ktx
    implementation deps.lifecycle.java8
    implementation deps.glide.runtime

    implementation deps.dagger.runtime
    implementation deps.dagger.android
    implementation deps.dagger.android_support
    implementation deps.constraint_layout
    implementation deps.kotlin.stdlib
    implementation deps.coroutines.android

    implementation deps.timber

    kapt deps.dagger.android_support_compiler
    kapt deps.dagger.compiler
    kapt deps.lifecycle.compiler

    testImplementation deps.junit
    testImplementation deps.mock_web_server
    testImplementation deps.arch_core.testing
    testImplementation deps.mockito.core

    androidTestImplementation deps.atsl.core
    androidTestImplementation deps.atsl.ext_junit
    androidTestImplementation deps.atsl.runner
    androidTestImplementation deps.atsl.rules

    androidTestImplementation deps.app_compat
    androidTestImplementation deps.recyclerview
    androidTestImplementation deps.cardview
    androidTestImplementation deps.material

    androidTestImplementation deps.espresso.core
    androidTestImplementation deps.espresso.contrib

    androidTestImplementation deps.arch_core.testing
    androidTestImplementation deps.mockito.core
    androidTestImplementation deps.mockito.android
}
いかがでしたでしょうか?
今回は開発開始してからほぼ3年が経過しているアプリを用い、実践的なmodule分割をおこないました。
codelabsという特性上、細かくmodule分割をおこなっています。
実際はexecutorやenvvar、diといった小さな単位でmoduleをつくるのではなく、例えばcore moduleを作り、そちらに集約する、という手もあります。
ただし、あまりに汎用的なmodule名(例:common)にしてしまうと、色々なクラスが存在する神moduleになってしまう危険性もあります。名前に気をつけたり、moduleが大きくなってきたら分割するなどをお勧めします。
また、今回はcodelabsのボリューム上、multi moduleにおいてDagger周りをどうするか?という部分には触れていません。
ぜひ、DroidKaigi Conference appなどを参考に、ご自身でDagger周りの改善をおこなってみてください。